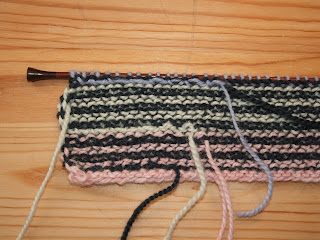
On with the tutorial. I am working on the Cozy Boatneck Sweater from Itty-Bitty Nursery. The pattern involves stripes of garter ridges and there are plenty of ends to deal with as the colors change.
I usually start this technique 2 stitches in from the edge in order to avoid too many tension problems at the edge of the piece. Start by knitting the first two stitches of the new row. In my right hand I have the working yarn and in my left I have the ends that I want to weave in:

Here I am weaving in two ends at once, the end tail of a color that I am finished with (navy) and the beginning piece of the light purple that I am joining.

I like to hold the ends between the middle and ring fingers of my left hand to maintain tension while I knit.

Insert the right needle into the next stitch on the left needle as if to knit. Then, using your left hand, bring the ends around the back of the right needle tip and up over the needle.

Now hold the ends down and out of the way below the needle and bring the working yarn around the right needle tip as you would to knit.


Using your left hand, bring the ends back up over the right needle tip so that they cross over the working yarn behind the right needle.

Here you reverse the motion that you used to wrap the ends up above. There you wrapped from right to left around the needle and here you unwrap from left to right.
Now bring the newly knitted stitch through the loop on the left and off the left needle, just like if you were knitting regularly. The ends are held safely in the back of the work with your left hand.

The next stitch is easy - just hold the ends out of the way with your left hand and knit the next stitch.

Repeat this two-stitch pattern [wrap 1, knit 1] four or five times to secure the ends. You can always wrap more but I would not want to do less than this for fear of the yarn coming out after the garment has been worn. When you are done wrapping, just drop the ends and continue knitting.
This is what the back looks like. You can see that the ends are caught in the back of the loops that go over the needle to make the knit stitches.

When you are done with the piece, block it if you are so inclined and then trim the ends flush with the back of the fabric. It is a great feeling knowing that you only have to trim those ends instead of having to weave them in.
No comments:
Post a Comment